Choose the source
What picture works best for a Perler bead pattern?
An image to Perler beads converter cannot preserve every photographic detail because the result is a fixed grid of discrete colors. The strongest source pictures already communicate through silhouette, large color areas, and a few important landmarks. Improving the source usually gives a larger quality gain than simply increasing the color limit.
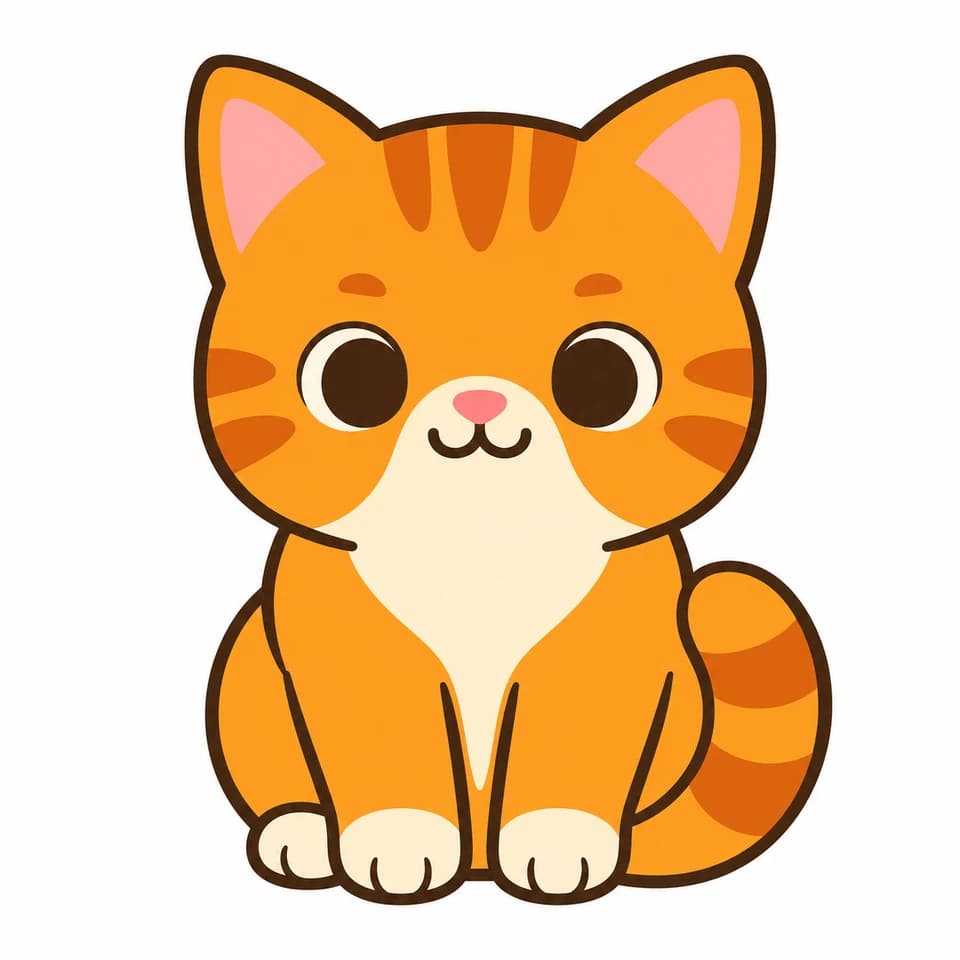
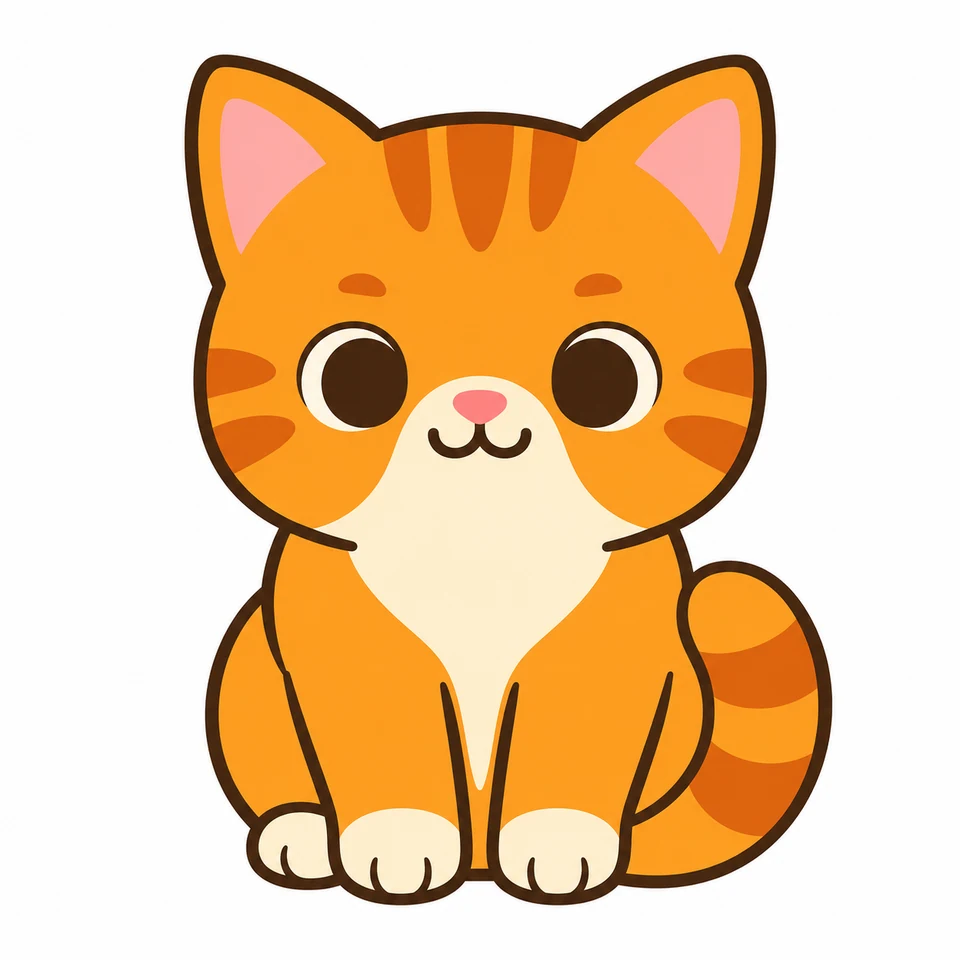
The cat has a centered subject, a plain near-white background, a strong dark outline, large orange and cream regions, and recognizable eyes, ears, paws, and tail. Those features survive when the picture is reduced to a bead grid.
Source provenance: site-owner-commissioned AI artwork, archived with the public pattern asset set.
Look for these qualities
One recognizable subject
A single animal, icon, flower, vehicle, or character is easier to read than a group of several small subjects.
A clear outer silhouette
Strong separation between the subject and background helps the grid keep ears, tails, petals, wheels, and other defining shapes.
Large color regions
Broad areas of similar color convert more cleanly than fine gradients, reflections, fabric textures, or photographic noise.
Enough contrast at landmarks
Eyes, mouth, outline, and other key features need enough contrast to remain visible after the image is sampled.
Prepare these images first
Busy backgrounds
Crop the subject or replace the background before conversion. Otherwise background details can consume colors and beads.
Tiny text and thin lines
Small lettering and one-pixel details often disappear or break apart, especially on a compact grid.
Several small faces
A group photo needs a much larger grid than a single portrait. Start by cropping to the main face or subject.
Low-contrast photos
If the subject and background share similar tones, raise contrast or simplify the background before using the converter.
Step-by-step method
How to convert a picture to a Perler bead pattern in six steps
The current workbench keeps the workflow deliberately small and predictable. Set the parameters, choose the image, inspect one deterministic result, and download the materials list. If you change a setting, choose the image again to generate a fresh result with that setting.
- 1
Prepare and crop the source picture
Crop close enough that the subject fills most of the frame, while leaving a little breathing room around important edges. A square crop is easiest to reason about when rows and columns are equal. Remove distracting objects, tiny text, and unnecessary background texture before conversion. PNG, JPEG, and WebP are accepted by the current tool.
Keep ears, antennae, hair, wheels, or a tail inside the crop. A clipped landmark cannot be restored by a larger grid.
- 2
Choose the grid dimensions before uploading
Columns and rows control the number of possible bead positions. A 29 x 29 grid has at most 841 cells and suits icons, magnets, keychains, and beginner projects. A 58 x 58 grid has at most 3,364 cells and gives faces, curves, and small markings more room. Transparent or removed background cells do not require beads, so the final bead count is normally lower than the total cell count.
Start at 29 x 29 for a bold symbol and 58 x 58 for an illustrated animal. Increase size only when the missing detail matters to recognition.
- 3
Select a palette and sensible color limit
Use the verified Generic 5 mm digital palette for a reproducible reference result. The maximum color setting is a ceiling, not a promise that every color will be used. A low limit creates larger, easier color blocks. A higher limit can protect subtle features but also increases sorting and purchasing work. Brand starter palettes remain behind a review warning because their source, series, version, and license data are not yet approved as official measured charts.
Try 8 to 14 colors for compact projects and up to 22 for a detailed illustration. Prefer the lowest limit that keeps the subject recognizable.
- 4
Choose the image and let the browser convert it
Open the homepage workbench and select the prepared file. The browser decodes the image, draws it into a bounded Canvas at the chosen row and column count, samples each cell, and maps the result to the selected palette. The public workbench does not call the upload API or storage provider for this conversion, so your custom source file stays in the current browser session.
The converter removes a near-white background automatically. A clean white or transparent source is more predictable than an off-white textured wall.
- 5
Inspect the silhouette, landmarks, and material counts
Look at the pattern at both normal size and a smaller thumbnail. The thumbnail test reveals whether the subject is still recognizable. Check that eyes, mouth, outline, paws, petals, wheels, or other important landmarks remain connected. Then review the displayed bead count, number of used colors, and the count for each palette color. These values come from the same RuntimeGrid that renders the preview.
If a detail looks noisy, reduce the color limit. If an important feature disappears, use a larger grid or simplify the source crop.
- 6
Regenerate if needed, then export the current result
To compare another setting in the current release, change the rows, columns, palette, or maximum colors and select the same image again. Once the result is clear and buildable, download the UTF-8 CSV materials list. It records stable palette IDs, color codes, names, hex references, and bead quantities. Free template pages also provide ready-made PNG and PDF files, but custom image export from the workbench currently focuses on CSV.
Save the chosen settings with your project notes. The grid size, palette version, and color limit are needed to reproduce the same conversion later.
Ready to test your picture?
Set the grid and maximum colors first, then choose a PNG, JPEG, or WebP file. The image stays in your browser during conversion.
Real parameter comparison
The same cat at three grid and color settings
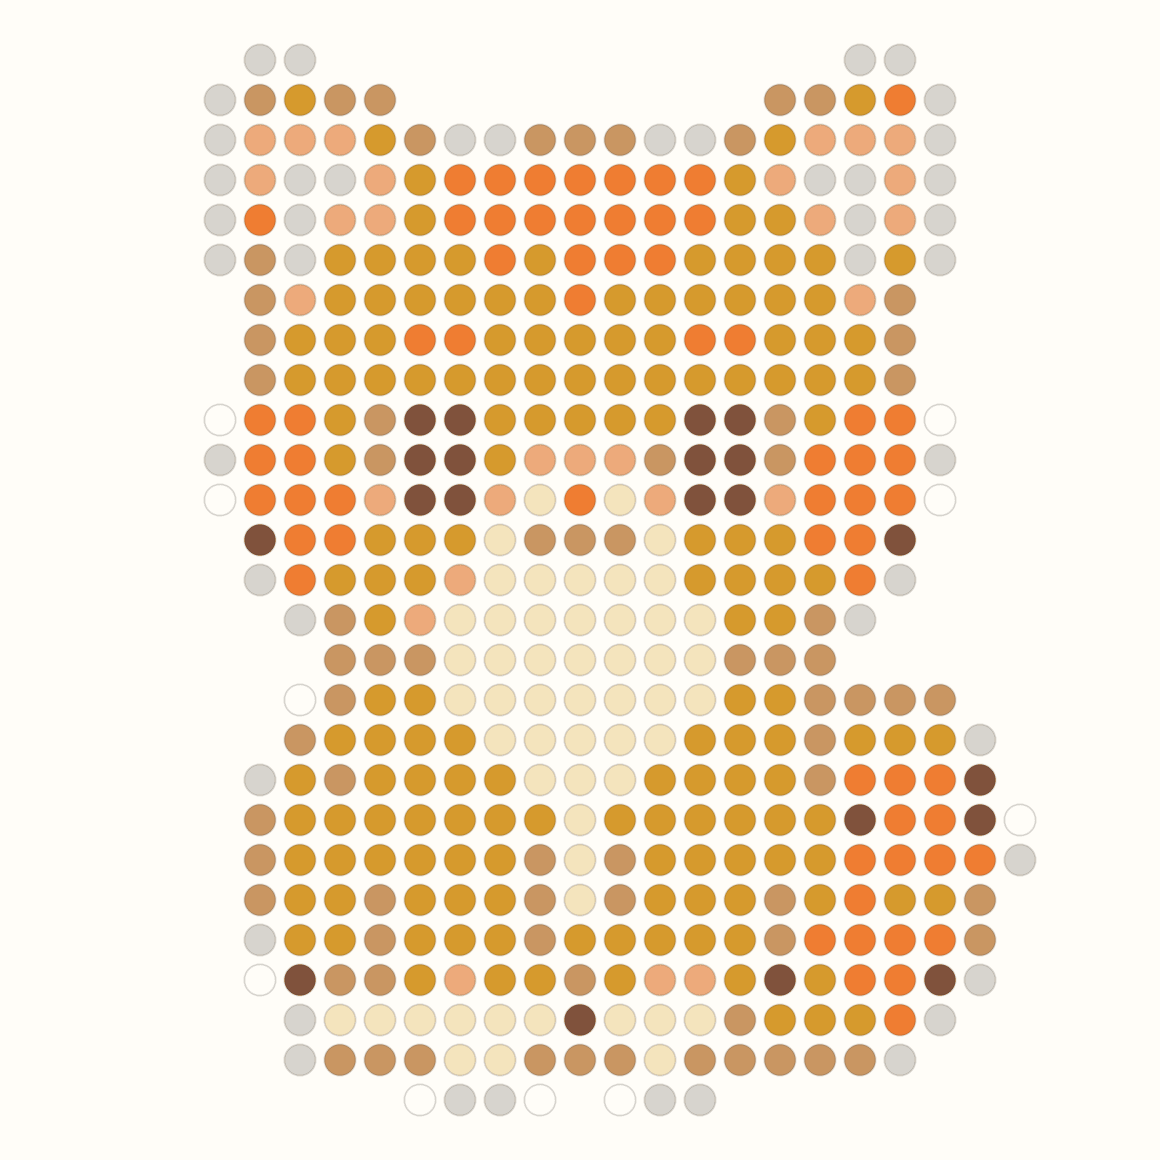
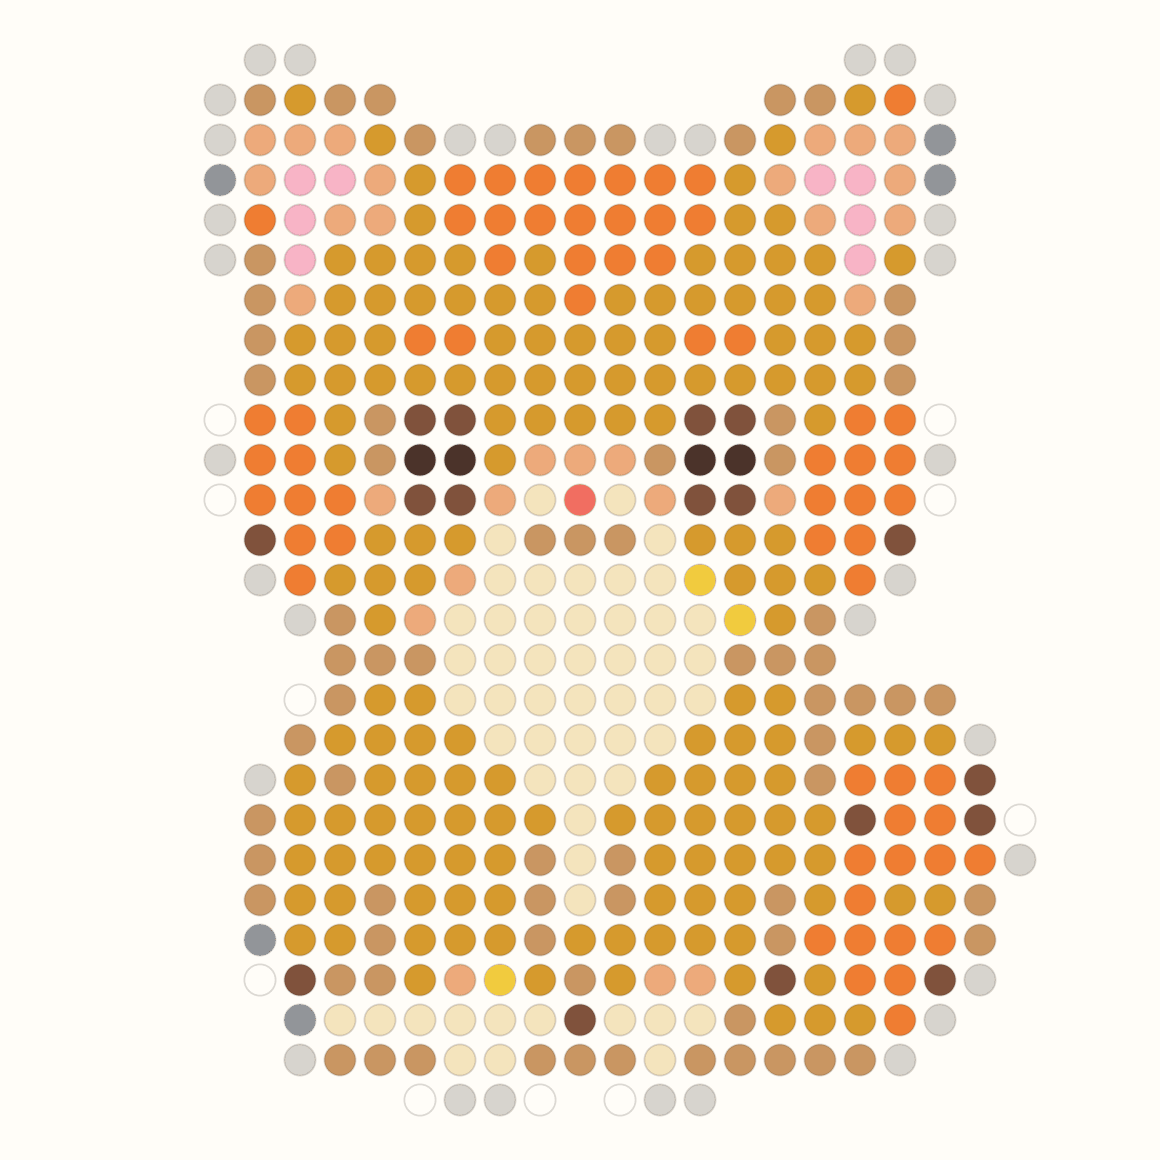
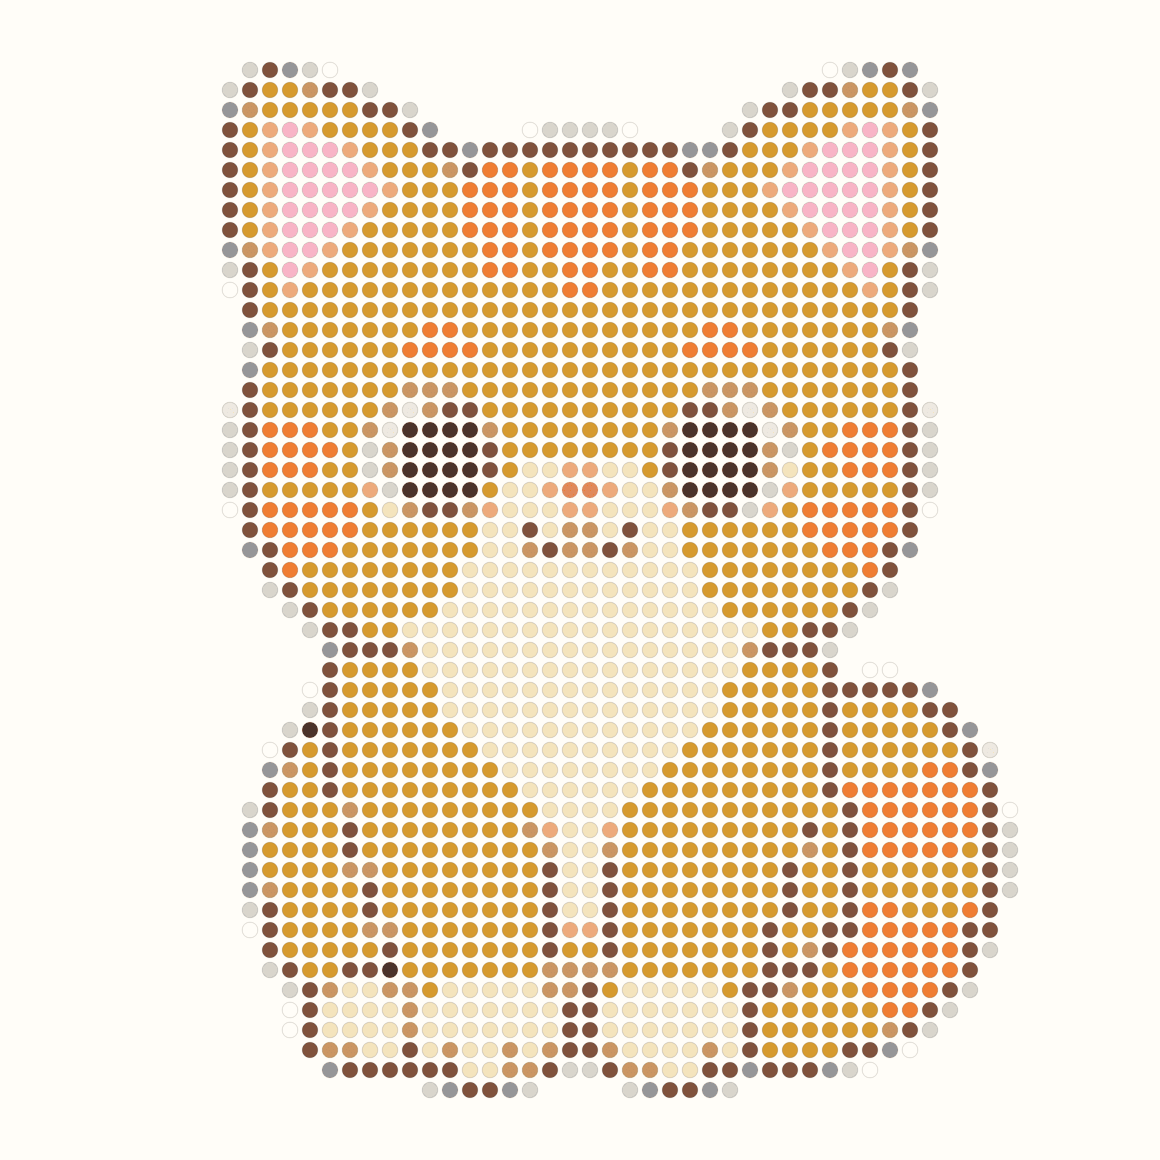
These three patterns were generated from the same archived cat source with the current algorithm and the verified Generic 5 mm digital palette. The displayed bead and color counts are actual output, not estimates. Comparing them shows why grid size and color limit solve different problems.
Compact and simple
- Grid
- 29 x 29
- Used colors
- 8
- Beads
- 451
A maximum of 8 colors produces 8 used colors and 451 placed beads. The face and tail remain recognizable, while subtle ear, eye, and outline differences are merged into larger color blocks.
Compact with more color separation
- Grid
- 29 x 29
- Used colors
- 13
- Beads
- 451
A maximum of 14 colors produces 13 used colors and the same 451 occupied cells. Extra color separation restores pink ears and small facial accents, but the physical project is not larger.
Larger grid for clearer landmarks
Best detail- Grid
- 58 x 58
- Used colors
- 13
- Beads
- 1,720
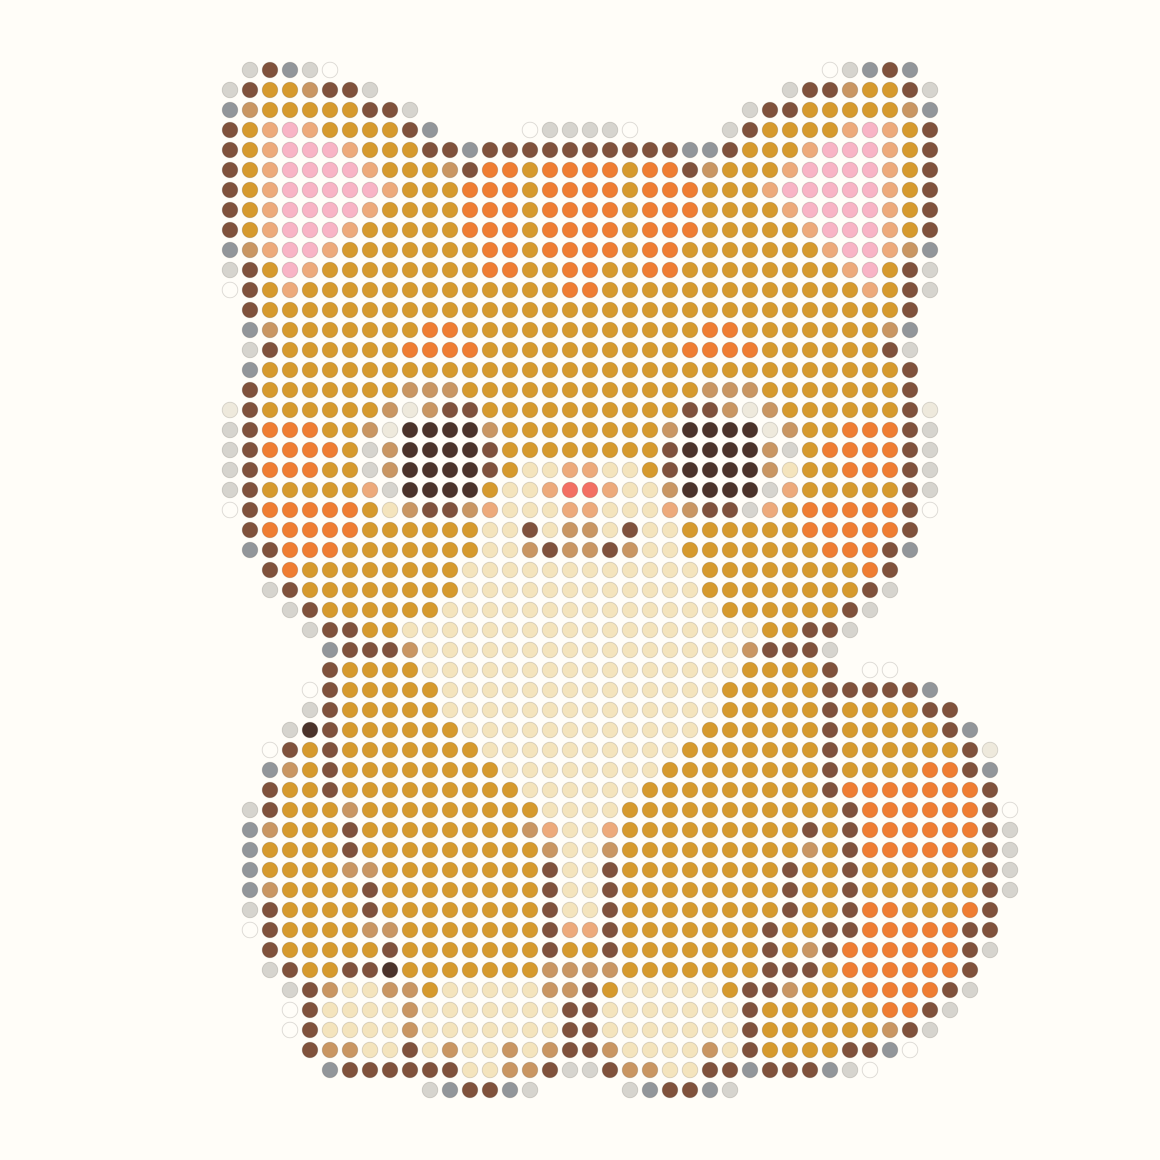
A maximum of 22 colors produces 13 used colors and 1,720 placed beads. The larger grid improves the outline, eyes, paws, chest, and tail bands. It is the clearest version, but it needs more space, time, and materials.
Download or open the cat patternWhat this comparison teaches
Raising the color limit on a small grid changes color separation but does not create new bead positions. Raising the grid size creates more positions and can protect curves and landmarks. Choose grid size for shape detail, then use the color limit to control material complexity.
Troubleshooting
Common image to Perler beads conversion mistakes
Most weak patterns come from a mismatch between the source picture, grid size, and color limit. Fix the cause instead of repeatedly adding more colors.
The subject is hard to recognize
The subject is too small in the crop or the grid does not have enough cells for its landmarks.
Crop closer first. If the silhouette is still unclear, increase rows and columns while keeping the source simple.
The pattern looks speckled
Photographic texture, shadows, or a high color limit creates many isolated color changes.
Simplify the source, lower the maximum colors, or choose an illustration with larger color regions.
The background uses many beads
The background is not transparent or close enough to white for automatic removal.
Remove the background before upload or replace it with a clean transparent or white area.
The colors do not match purchased beads exactly
Screens, photographs, dye lots, and digital palettes are not identical physical measurements.
Use the verified generic palette for planning, then compare the final list against the physical brand chart you intend to buy.
A change did not affect the existing preview
The current workbench converts when a file is selected and does not retain the private source file for automatic reprocessing.
Change the parameter, then choose the same image again to create a fresh result.
Before you build
Check the pattern before exporting or placing beads
A technically valid grid is not automatically a comfortable craft project. Do one final review at the size and color complexity you actually plan to build.
- The silhouette is recognizable when the preview is viewed as a small thumbnail.
- Important landmarks are connected and are not reduced to isolated single beads by accident.
- The number of used colors is realistic for sorting, purchasing, and keeping organized.
- The background is empty or intentional, rather than a large accidental field of near-white beads.
- The bead count fits your available pegboards, workspace, budget, and completion time.
- The palette name and version are recorded so the same result can be reproduced and reviewed.
The current custom workbench exports a UTF-8 CSV materials list. For a ready-made example, the free cat template page includes downloadable PNG and PDF files plus the option to open its public template in the workbench.
This guide stops at pattern creation and material planning. Fusing requires heat and must follow the instructions supplied with your bead brand, pegboard, ironing paper, and iron. An adult should handle the iron, children should remain at a safe distance, and the work should be done on a flat heat-safe surface. This page intentionally does not prescribe a universal temperature or heating time.
Read the official Perler project safety instructionsQuestions
Questions about making a Perler bead pattern from a picture
Can I turn any photo into a Perler bead pattern?
Most PNG, JPEG, and WebP images can be processed, but not every photo becomes a useful craft pattern. A single subject, clear silhouette, simple background, and visible landmarks give the best result. Group photos and detailed landscapes usually need a larger grid or careful cropping.
What grid size should a beginner choose?
Start near 29 x 29 for a simple icon or small character. Use a larger grid such as 58 x 58 when the picture needs facial details, curves, or several connected landmarks. A larger grid can require several times more beads, so increase it for recognition rather than by default.
How many colors should a Perler bead pattern use?
There is no universal best number. Eight to fourteen colors is a practical starting range for a compact design, while a larger illustrated subject may benefit from a higher limit. The actual used color count can be lower than the maximum. Choose the smallest set that preserves the features you care about.
Does the pattern maker upload my picture?
The current public workbench processes custom files locally with browser File and Canvas APIs. It does not call the storage upload endpoint during the core conversion flow. Public template images are separate site assets and do not contain your private source picture.
Are the palette colors official Perler, Hama, MARD, or Artkal colors?
The recommended generic palette is an internally defined, verified digital reference. It does not claim official brand compatibility. Brand starter palettes remain marked pending until their source, series, version, measurement method, and license records pass the project data gate.
Can I sell something made from the generated pattern?
The converter does not grant rights to an input image. Commercial use depends on the rights attached to the source picture, characters, logos, and other protected content. Use an image you created or have permission to use, and review the relevant license before selling finished work.
Turn your picture into a buildable bead grid.
Start with a clear image, set a grid and color limit, then inspect the real bead and material counts in your browser. If you want a ready-made project first, browse the free pattern library.